

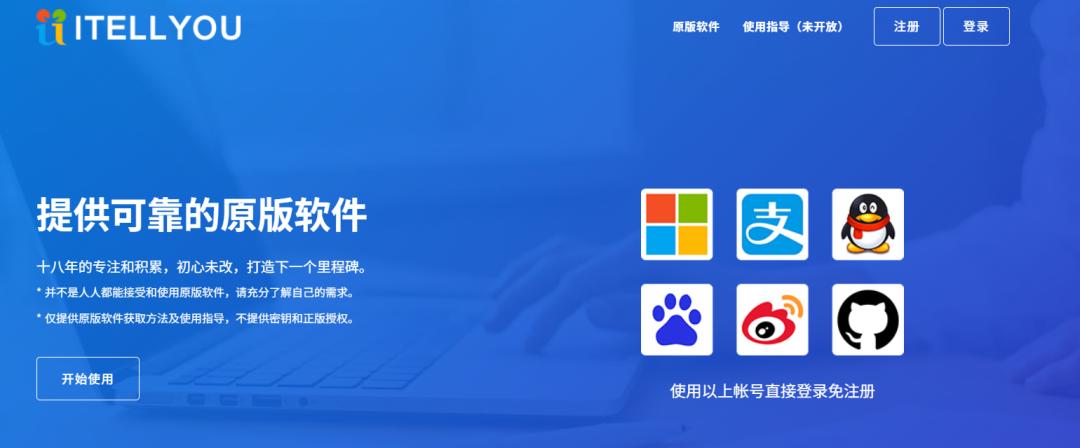
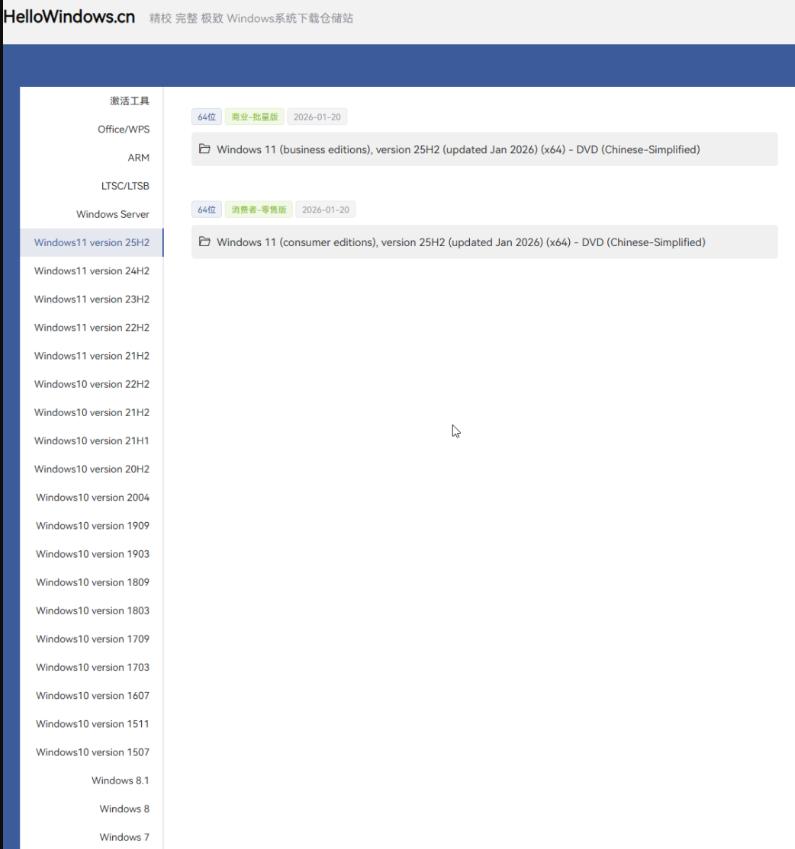
This needs to be logged in, but it is also very simple, with a very simple interface, which has a straight chain of versions (including annual updates) that is suitable for quick search。
How do you install the original mirror? Step 1: create a u-disk starter
This is an example of a small-armour drive starter, with other tools operating similarly。
I. Download and install pe tools
1 visit the u-drill launch network () to download the latest version of the tool. It is divided into online and offline versions, and the newer recommends downloading online versions. You can also download the little soldiers' flash drive and start it。
Two, downloaded in green, we can download directly。
3 as much as possible before running off the poison software to avoid being accidentally killed or intercepted while writing key items。
Insert u discs and make starters
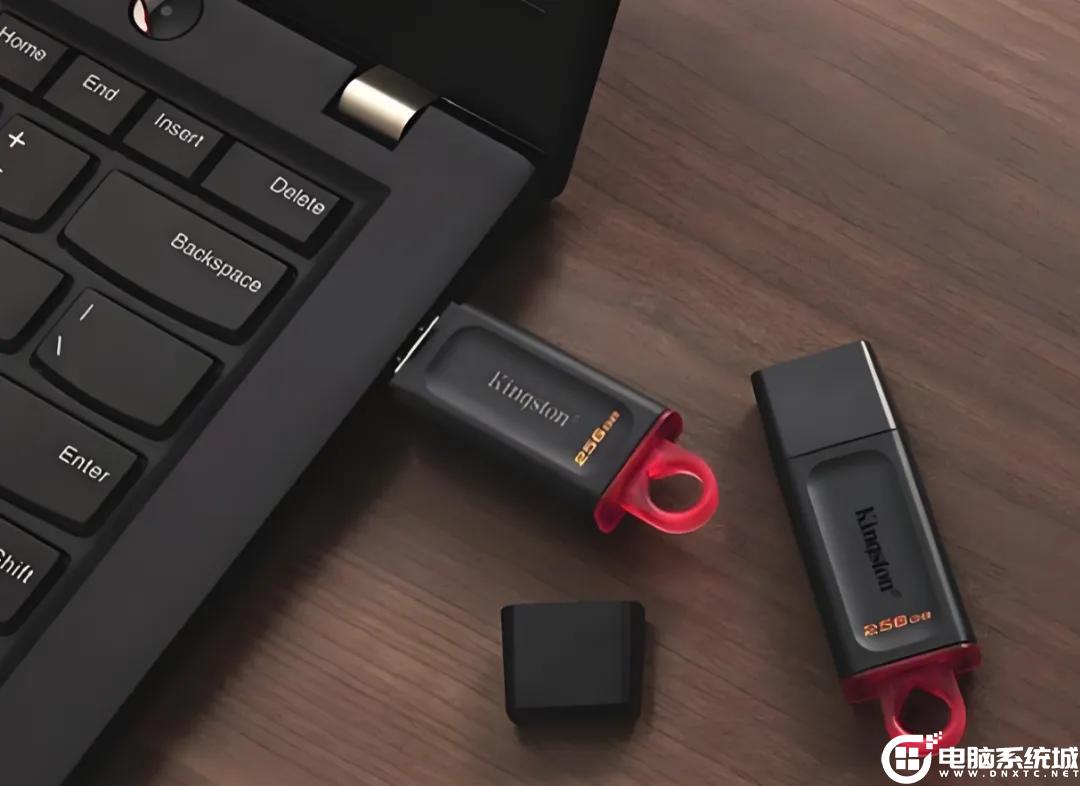
1, insert the ready u disk into the computer's usb interface. It would be preferable to insert the usb interface directly behind the main panel instead of the front panel interface (the front interface may have insufficient power supply)。
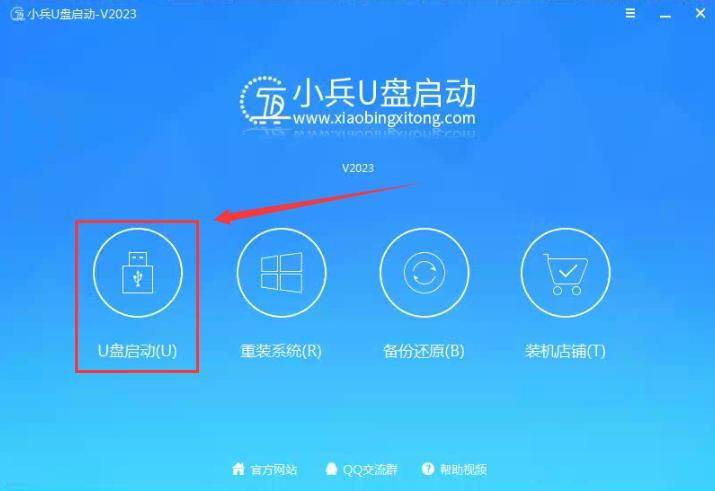
2. Opens the soldier drive starter, and the main interface displays the detected u-disk. Make sure the disk is correct and select the "u-drive" mode。
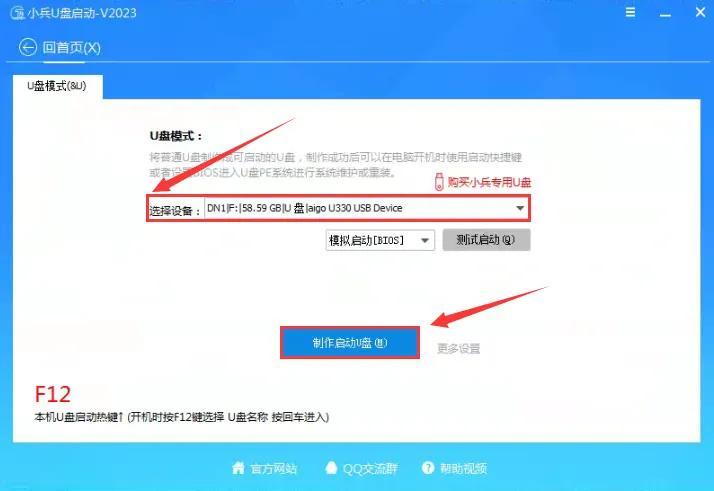
Three, click the "create start up" button. At this pointer, you will pop up a reminder box that the creation process will format the ucd and all data will be deleted. Please confirm that there are no important data in the u-disk!
4. Select the production mode: "producing start up" only makes the pe system; or "proceding start start up the disk+ system", the tool will automatically download the system mirror and write to the u-disk (recommended for start-up)。
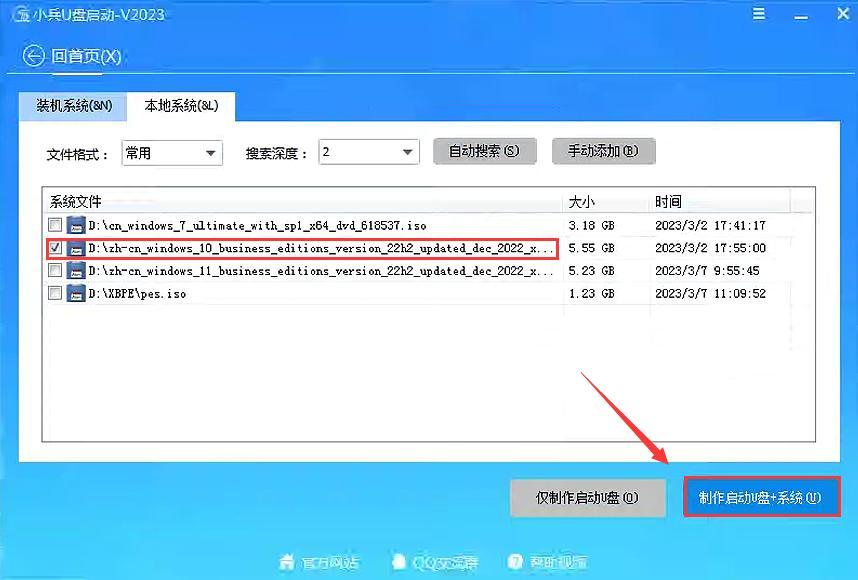
Five, click to start production, and the tool will automatically download the pe system and write to the ucd. This process may take 10-30 minutes depending on the speed of the network and the speed of ucd reading and writing. Do not unplug u-disk during production, do not close the program!
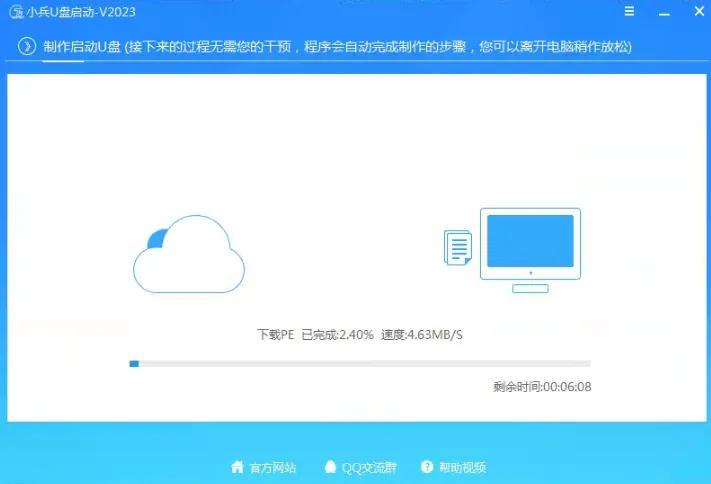
Progress tips: in the production process, you can see progress bars and ongoing operations (e. G. Downloading the pe system, writing the disk, authenticating files, etc.). If progress is stuck for long periods of time, it may be a network problem and a second or a shut-down of the poison-killing software could be available for retesting。
Step 2: start access to the pe system from the u-disk
Use the start-up menu shortcut (recommended for start-up)
The simplest way to do this is not to enter the bios modified settings, but only this time to start from the u disk and the next time to start from the hard drive。
One, insert the finished start-up disk to ensure that it is plugged in。
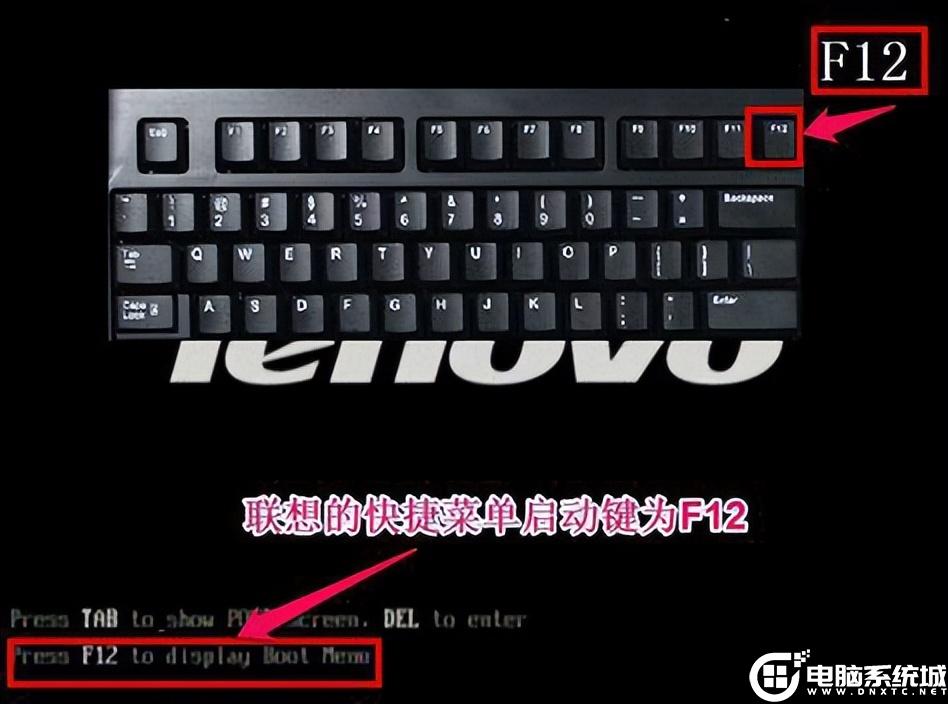
Two, restart the computer. When you turn it on, press the start menu shortcut quickly and continuously (usually f12 or esc). Note: press the logo as soon as the brand appears, or you may miss the time。
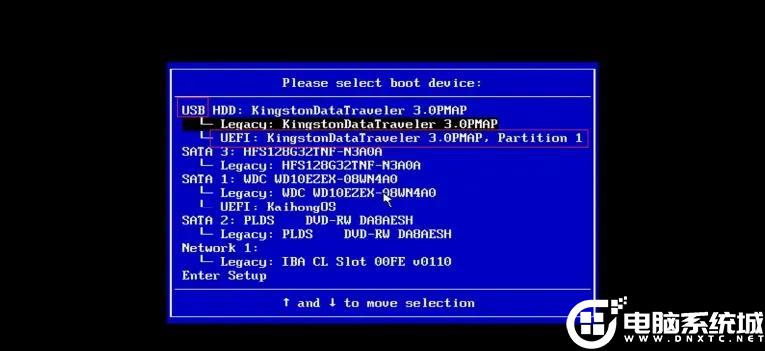
3 when the start menu appears, use the keyboard direction to select the u-start entry, and then press back to confirm. The u-disk start item is usually shown as "usb data", "uefi:usb", "sandisk"。
4 the computer will start from the u-disk and enter the pe system selection interface. Select the appropriate pe version according to your needs (win11 pe is usually recommended, the old machine is win2003 pe)。
Carnation tips: when you set up a drive to start the driveback, if you start with legacy, you can start with the following graphs, and if you use a uefi-started menu that does not appear, you can enter the pe system directly (the default is usually win11 pe or win10 p)。
️ common question: didn't react by pressing the shortcut? Maybe it's late, the computer's in the system, can reboot it, press it immediately when it's on. Or try other keys (f2, del, f8, f10, etc.), different brands may be different。
Step 3: installing systems using pe tools
Once the partition is completed, the installation of the system can begin. Here's an example of private pe's "system installation" tool。
1, open "systems installation" tools (or similar installation tools). Tools automatically detect u disk and hard disk information。
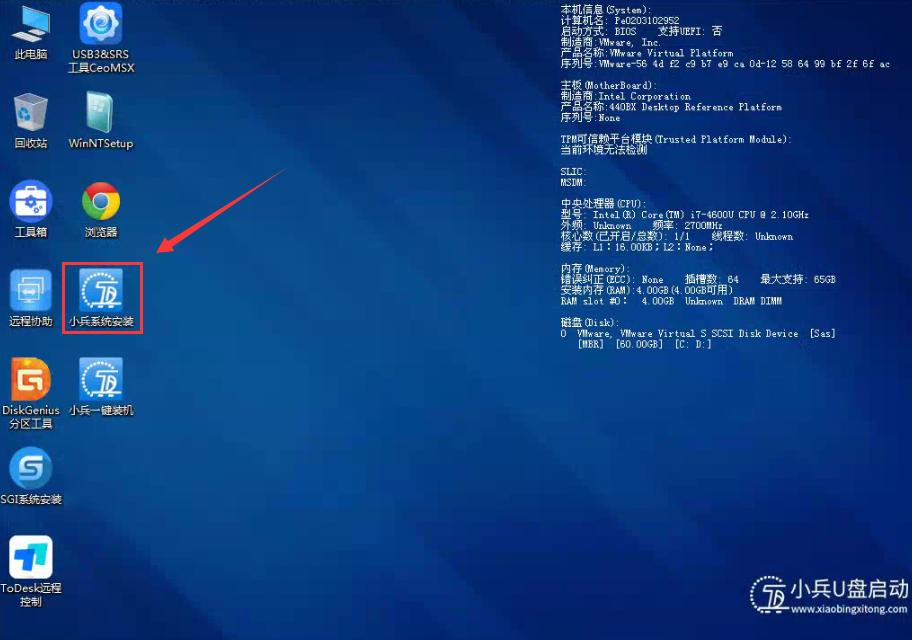
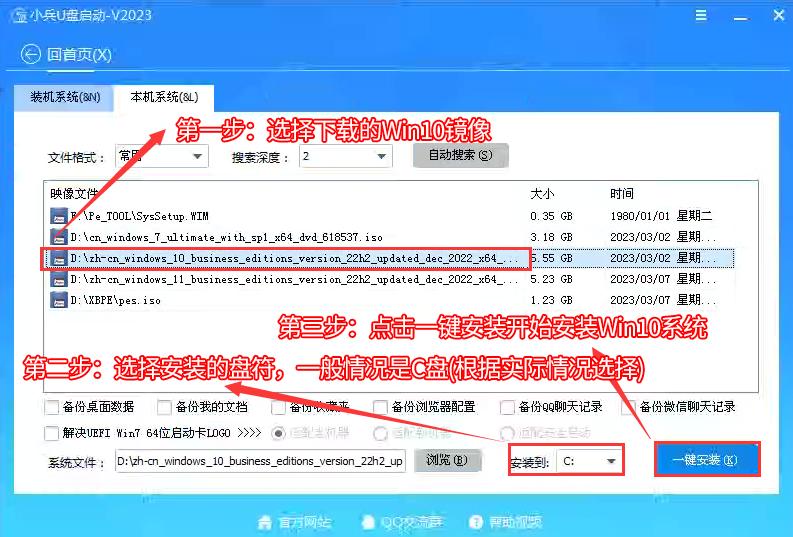
2. Select the system mirror file. If the mirror is in the u-disk, select the u-diskIso/wim/esd file. Tools automatically recognize and load mirrors。
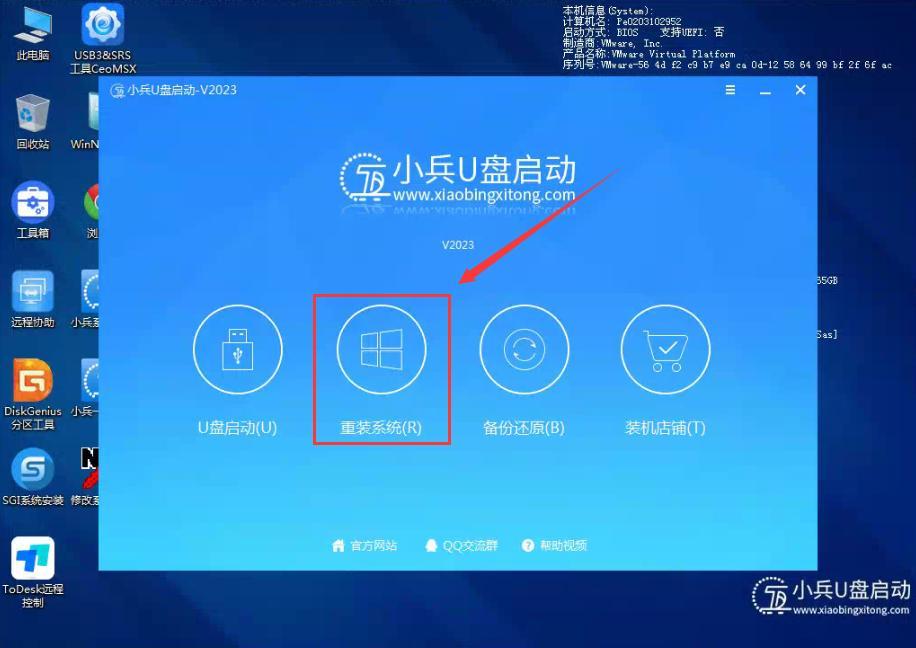
3. Select to install partitions (target discs, generally c discs) and suggest that diskgenius partition tools be opened to confirm the system discs you choose. Error selection leads to installation failure!
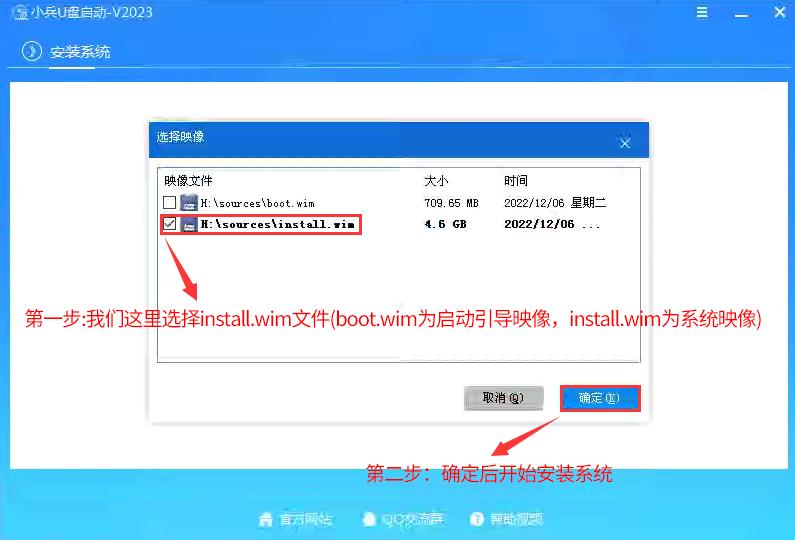
4 after a one-click installation, the system mirror is mounted (boot. Wim for boot image, install. Wim for system image) and then the system is mounted by selecting [install. Wim file], then by clicking [identified], then choosing the version to be installed, and then waiting for the system installation to be released, the computer will automatically restart the computer, and this process will automatically restart the installation。
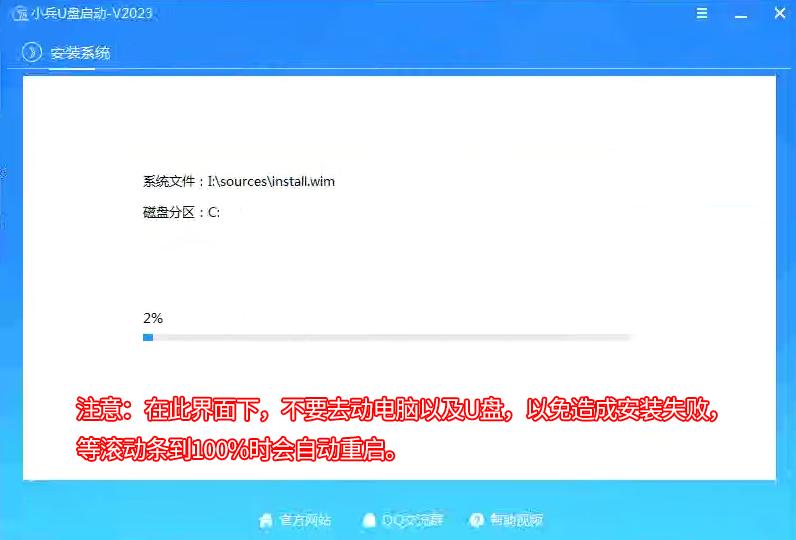
Five, click "step one" or "start one" and the tools will automatically mount mirrors, copy files, inject drivers, configure guides. This process may take 10-30 minutes depending on the size of the system and the speed of the hard drive。
Driver injection: private pe automatically detects hardware and injects required drivers, including intel vmd, usb 3. X, webcard drive. This is the greatest advantage over the original installation of mirrors to avoid the installation of rear blue screens or lack of internet access。